
Fuji GFX 100S: An Initial Review
I recently purchased the Fujifilm GFX 100S in order to add a high resolution body to my photography kit. While I love my Nikon Z7 and have an extensive kit for it, after decades of using a 4x5 camera, I was looking for a camera that had higher resolution than the Z7 and one that would encourage me to slow down in the field.
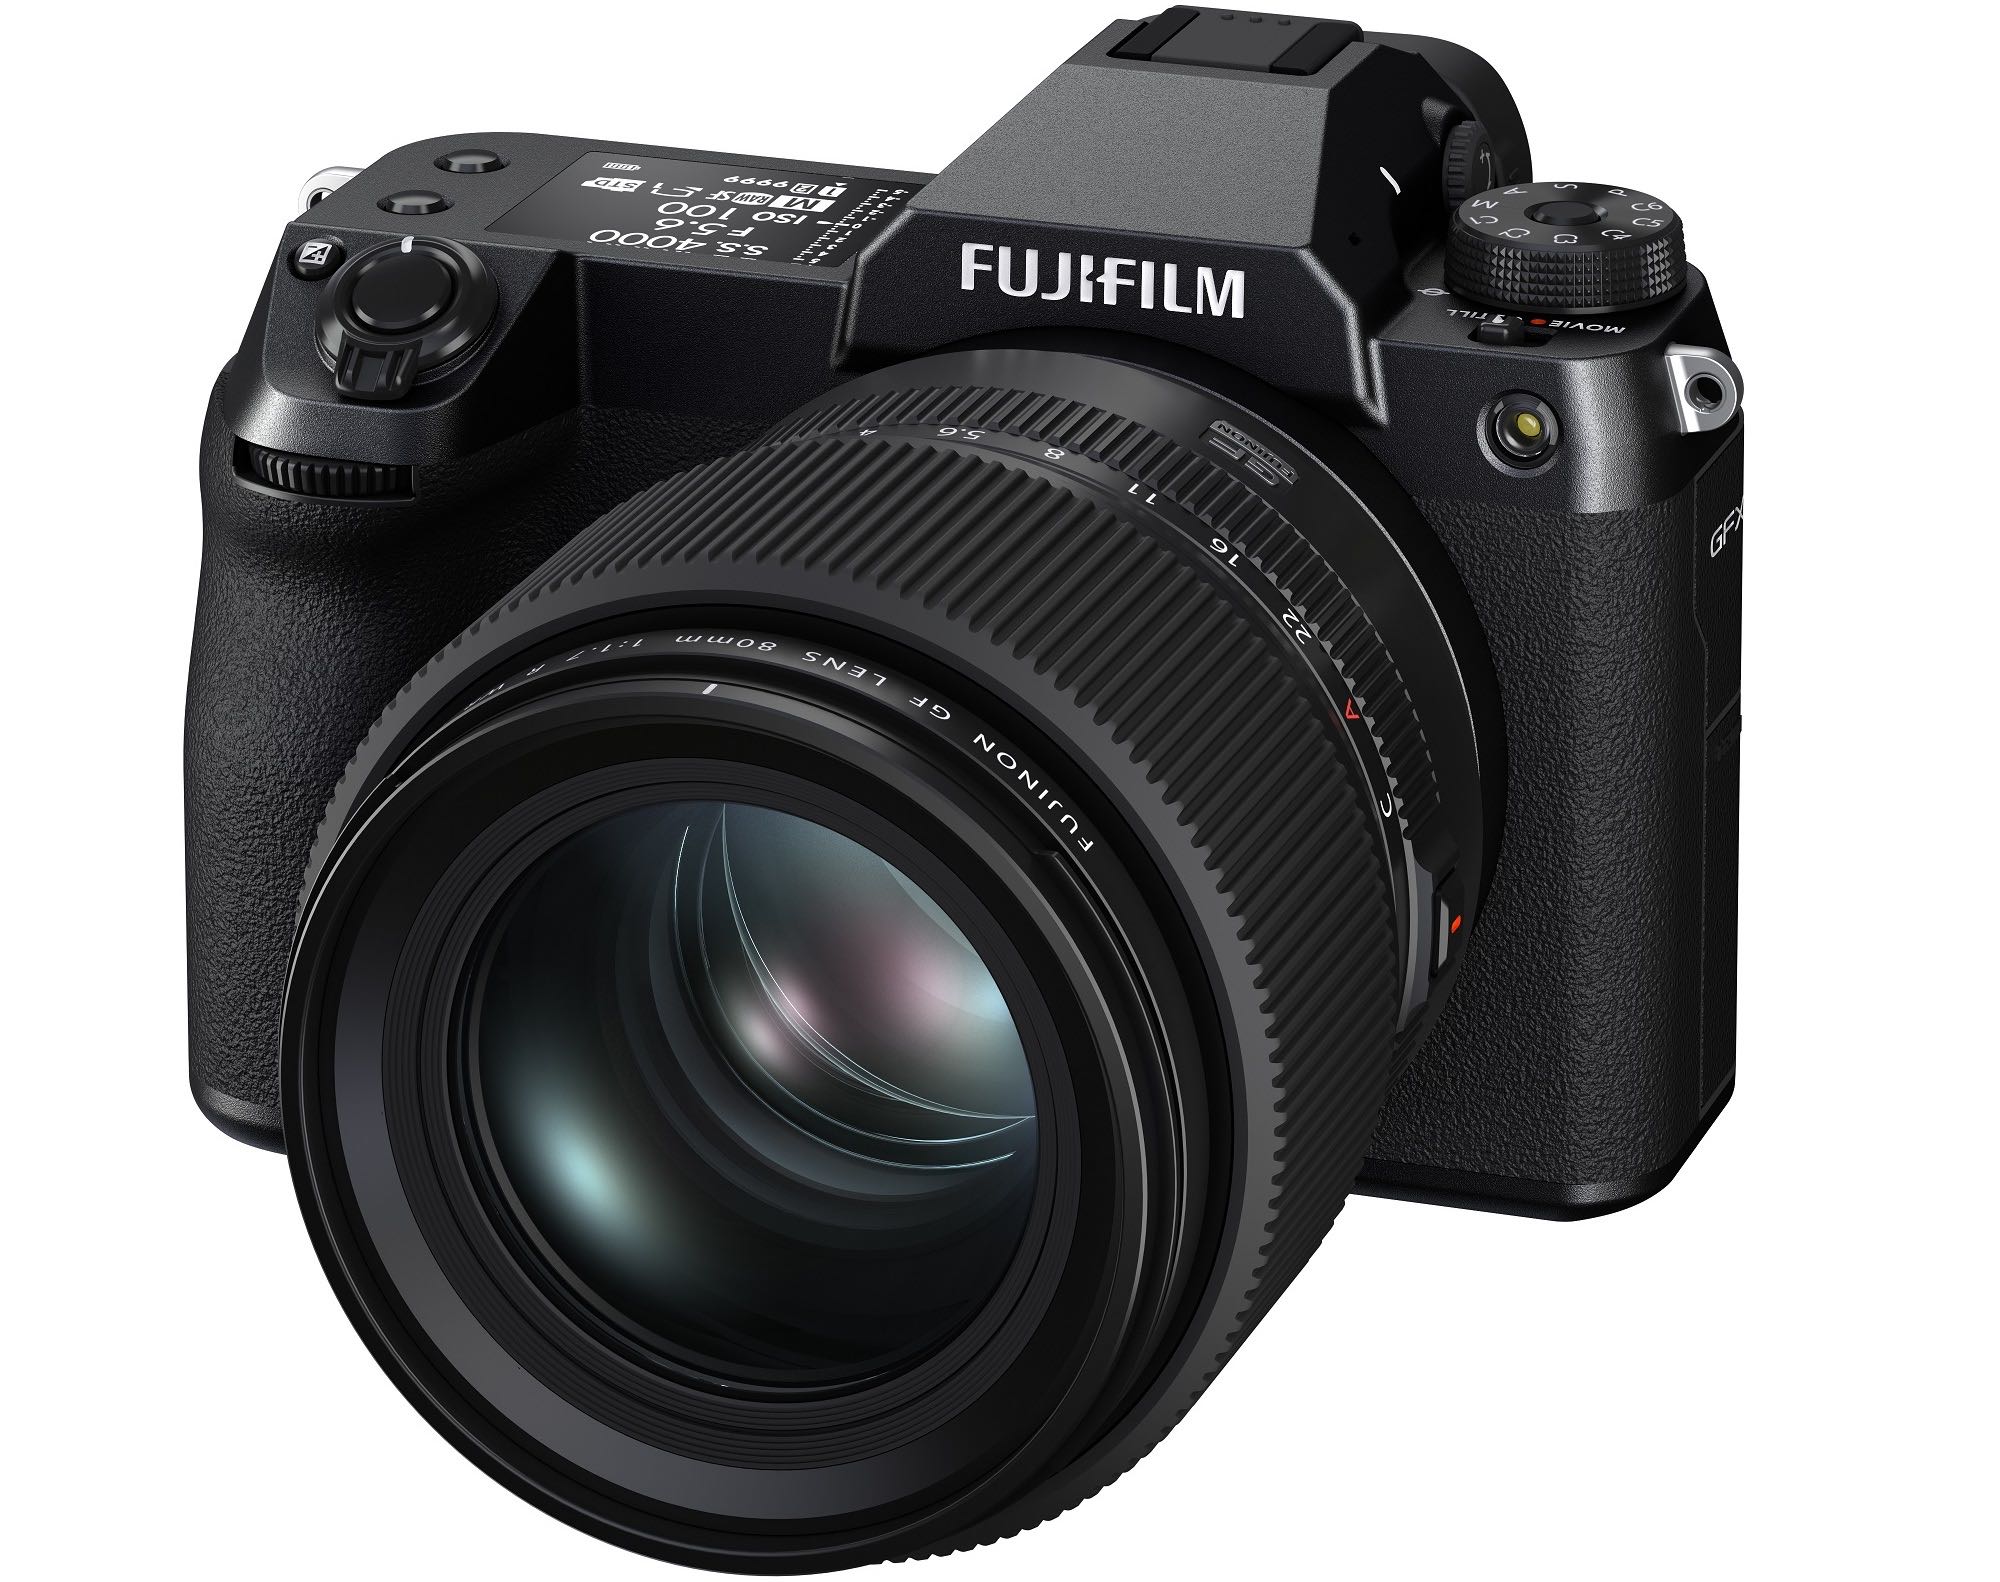
The GFX 100S is a medium format mirrorless camera, featuring a 102 mp back-illuminated CMOS sensor with the X-Processor. Unlike its sibling, the GFX 100, this camera features a more compact design; it’s about the size and weight of a modern DSLR, but somehow feels more solid.
There has been a lot of YouTube reviews and blog posts by other photographers about the GFX 100S camera. The majority of those reviews seem to have come from Fuji XT series camera owners, so coming from a full-frame 45mp Nikon Z7 my impressions are quite different. For this review, I’ve paired the camera with the Fujinon GF32-64mm f4 R LM WR lens.
Build
The moment you pick up the camera for the first time, you can’t help but feel the weight of the camera, it feels solid. Compared to my Nikon Z7, this thing is a beast, but a gentle one. The cameras fine craftsmanship is visible in its attention to detail, the thoughtful layout of controls and the general feel of the materials used on the surface of the camera. The grip is deep and solid, making it a joy when handholding the camera.
Initial Setup
The initial setup is quick and easy. You simply turn on the camera, select a language, and the camera immediately asks to go into paring mode with your phone. Paring with the phone allows the camera to update its date, time and location from the phone, and check for any firmware updates.
When I connected the camera to my smartphone, I was notified that there was a firmware update for the camera. The phone automatically started the download, transferring it to the camera, and finally installing it. That is much simpler than the process I use with my Nikon Z7.
The next step is to download the user manual from the Fuji website; the camera doesn’t come with any printed manual. Take the opportunity to register the camera with Fuji (if you don’t have an account, one will be created for you automatically).
Initial Impressions
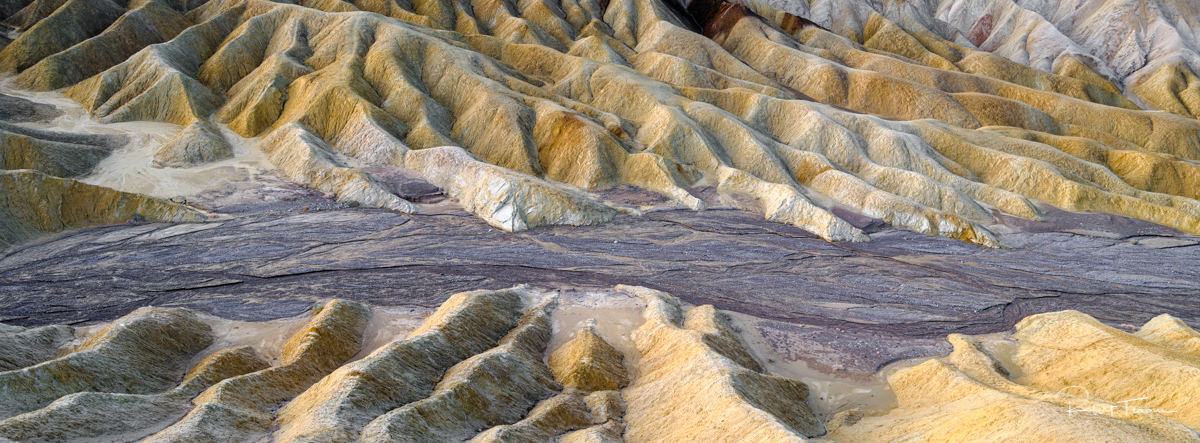
I recently returned from a trip to Death Valley National Park, where I was able to put the camera through its paces.
Starting the day at Zabriskie Point, I was able to capture the early morning light under a variety of lighting and contrast setups. I switched between shooting full frame and 16x9 panoramic (C1 and C2). The bentonite clay hills surrounding the point exhibits a wide range of colors and details.
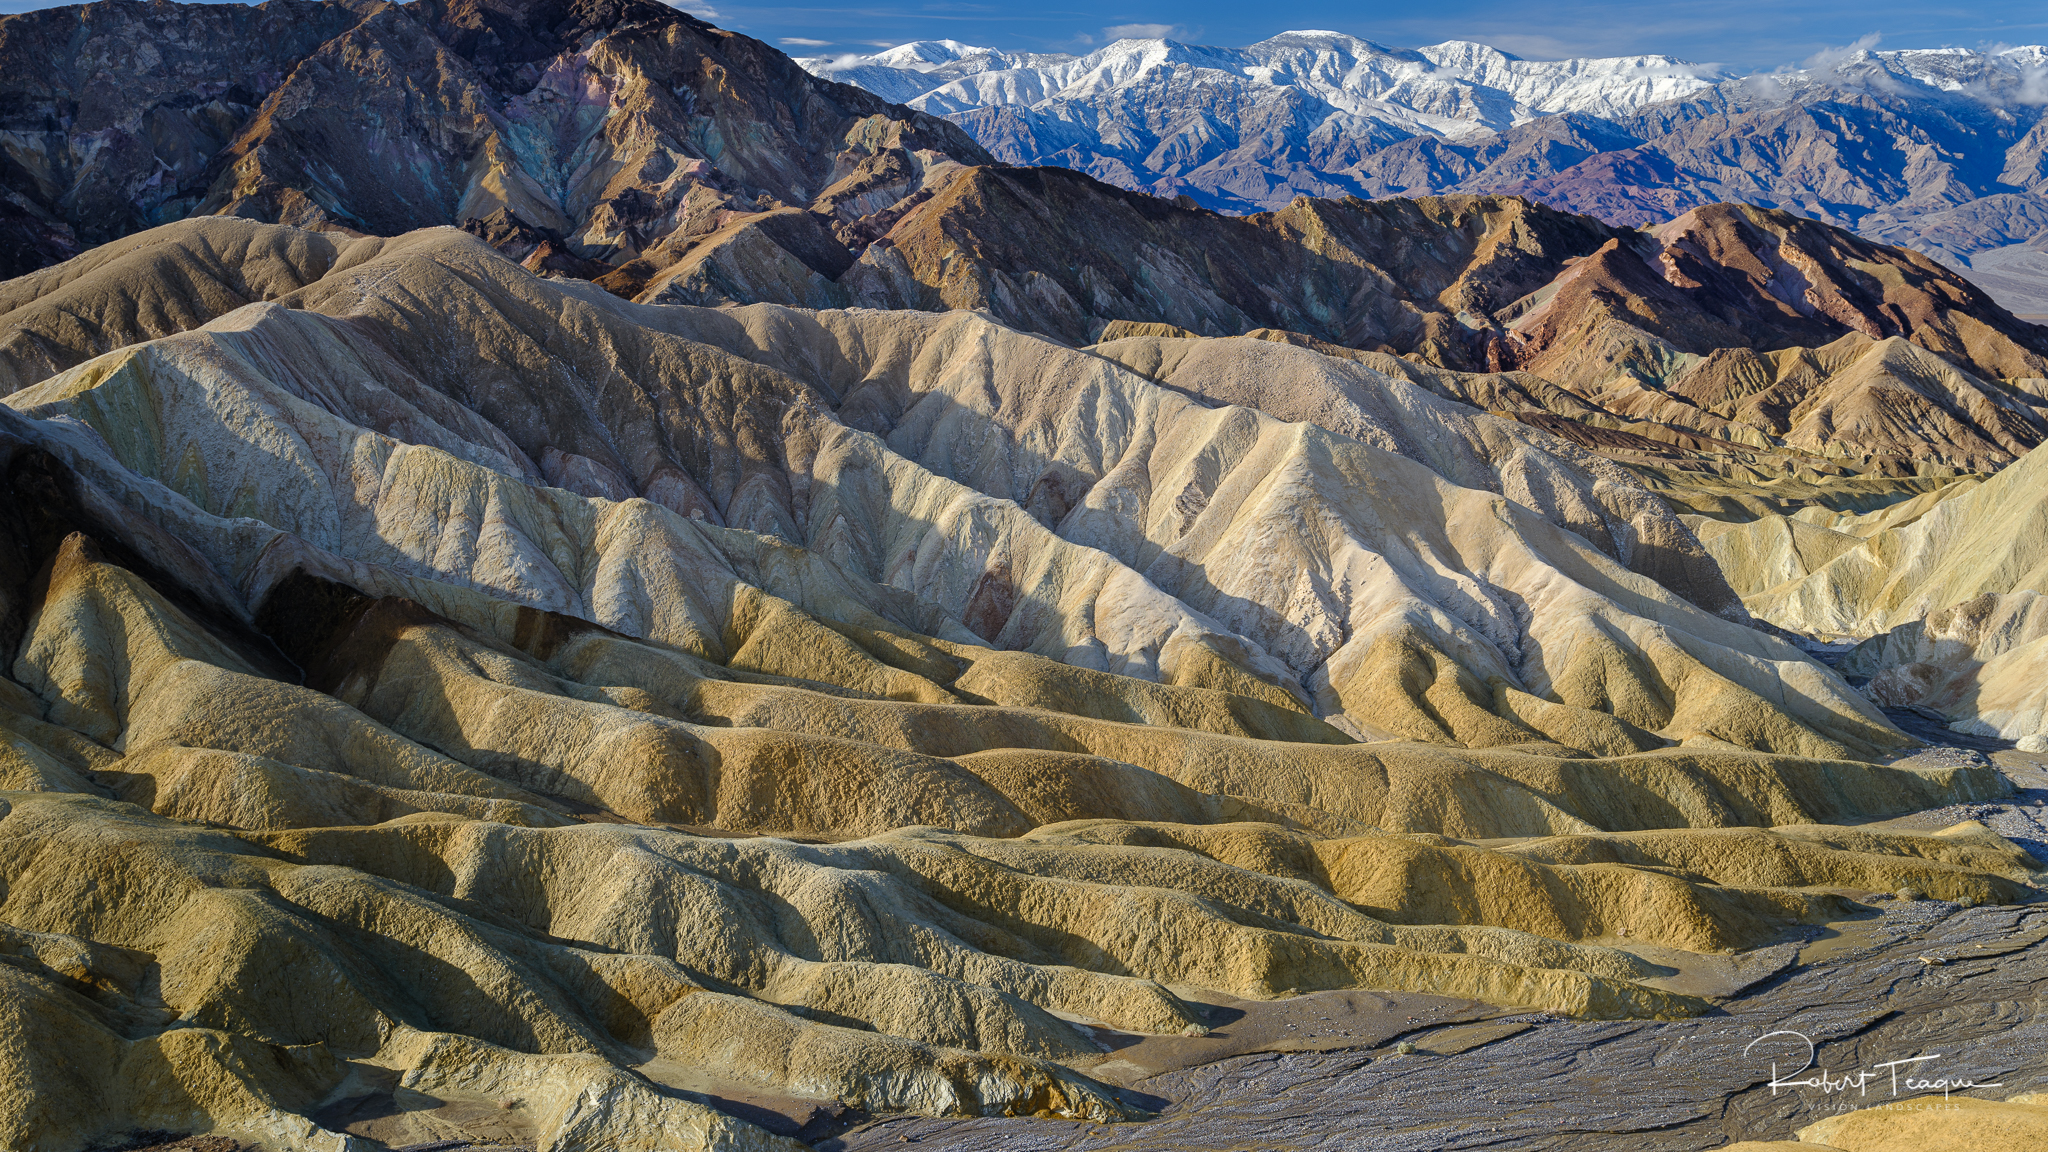
The image details and colors are simply outstanding. I kept switching back and forth between the Velvia and Provia film simulations. I just couldn’t decide which I liked better. This really only affects the image on the viewfinder as the raw file can be changed quite easily during post processing (the film simulation also affects which profile is used in the develop module in Lightroom).
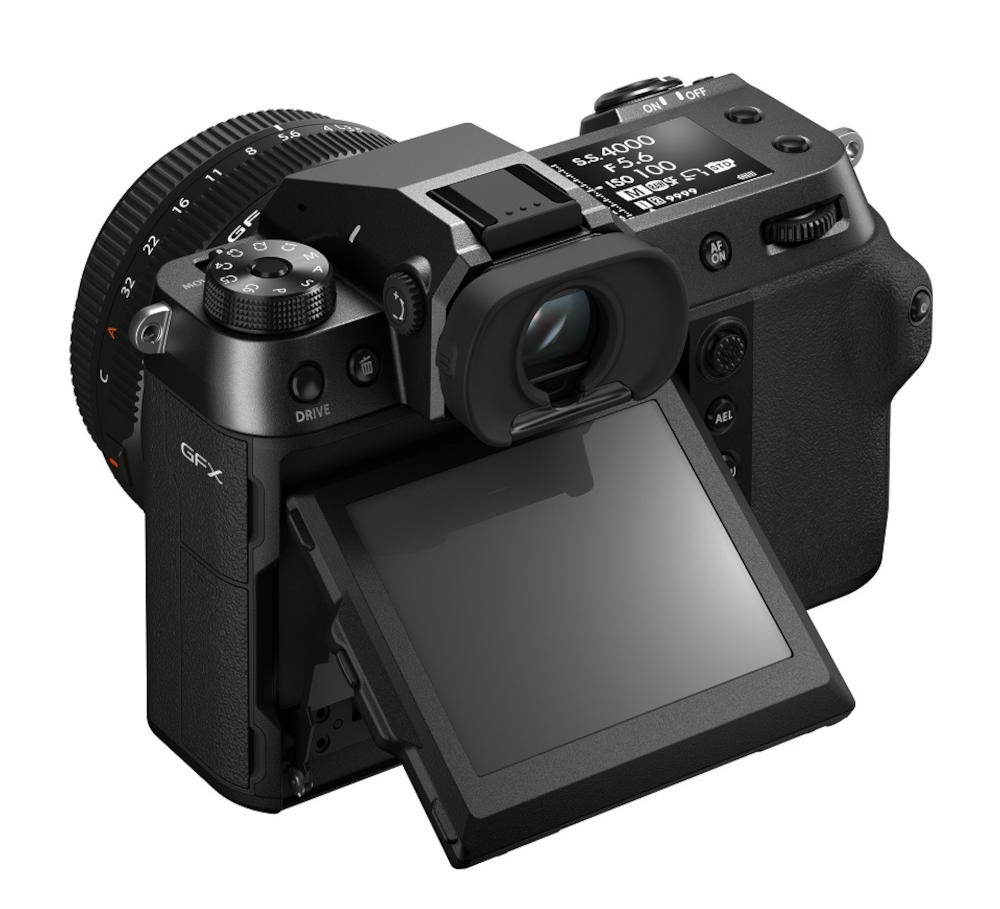
The viewfinder and rear LCD are both features which I like very much and help the composition process. They are easy to view and provide a lot of detailed information about the camera settings. I like to have the histogram in the viewfinder and often use the level on the LCD. I found the level to be more difficult to use than the one on the Nikon Z7, but it’s still useful.
However, the camera does let me down in specific ways that the hardware was designed. I find the length of the viewfinder blackout disconcerting. I originally used the front curtain shutter, but went to the electronic shutter for this reason; while not a good as the Nikon it’s acceptable. When taking a photo I can hear a whirring sound as the image is written to the card; the writing process feels slow (I am using V90 card, with fast write speeds). This is one area where I feel that had Fuji used a more modern card (like the CFExpress) it would have be less noticeable.
Other issues I had with the camera were simply related to my “Nikon” muscle memory and are not a reflection of how the camera was designed, but rather a learning process on my part.
Right off the bat, I found that lenses mount the opposite of Nikon; Fuji mounts clockwise, and the Nikon counter clockwise. Buttons often work in an opposite manner, like the on/off switch. Likewise , the lens release buttons are on opposite sides of the camera. This really only matters if you are either coming from a Nikon system (I don’t know how Canon or Sony operate), or using a Nikon in conjunction with the Fuji (as I was).
Overall though, I simply fell in love with using this camera. I don’t see it replacing my Nikon (the lens lineup just isn’t deep enough), but see it situations where I want the highest detail possible.
Final Thoughts
There is just so much to like about this camera, its build quality is superb, ease of handling and outstanding picture quality, make it a joy to use.
Likes:
- High megapixel sensor (102MP), making it easier to capture fine details.
- Six custom user banks (C1- C6), which are easy to setup.
- The top LCD has three different views that can be cycled through easily; detailed, dials or histogram. Additionally, it stays on when the camera is powered off, so you don’t have to turn the camera on to see what its settings are (it seems to be low powered).
Dislikes:
- Uses old style SD cards, instead of the more robust and modern CFExpress. This seems odd for a camera that needs to write big files to the card (and meaning you will spend a lot more time downloading those files to the computer).
- No battery charger. Fuji expects that you will either purchase one separately, or use the built in USB charging. I don’t like the idea of keeping the camera plugged into the electrical socket while charging; there’s just too much opportunity to knock it off the table.
- Formatting cards means going through the menus to find the Format option. I like to format my cards after I download the images to the computer, but you can’t put this into the My Menu (like I can do on my Nikon), so you have to step through the menu system to find it.
Accessory Notes
I purchased a couple of accessories to go with the camera, that I will quickly mention.
Small Rig L-Plate. Like many landscape photographers, I use an L-Plate to switch the camera orientation, so I purchased the Small Rig L-Plate as they come highly recommeded. It’s beautifully made, but the side plate covers the doors for the connectors and you can’t get them open without removing or extending the plate. The plate does have a built in flat screwdriver mounted on the bottom for that purpose.
Fujifilm Twin Battery Charger. if you buy the separate Fuji charger, keep in mind that it doesn’t come with a power cable. Fuji expects you to use the one that came with the camera (standard USB-C and wall adapter). It does seem to charge faster than the in camera charging.
Sample Images
All images were taken with the Fujinon GF32-64mm f4 R LM WR lens.
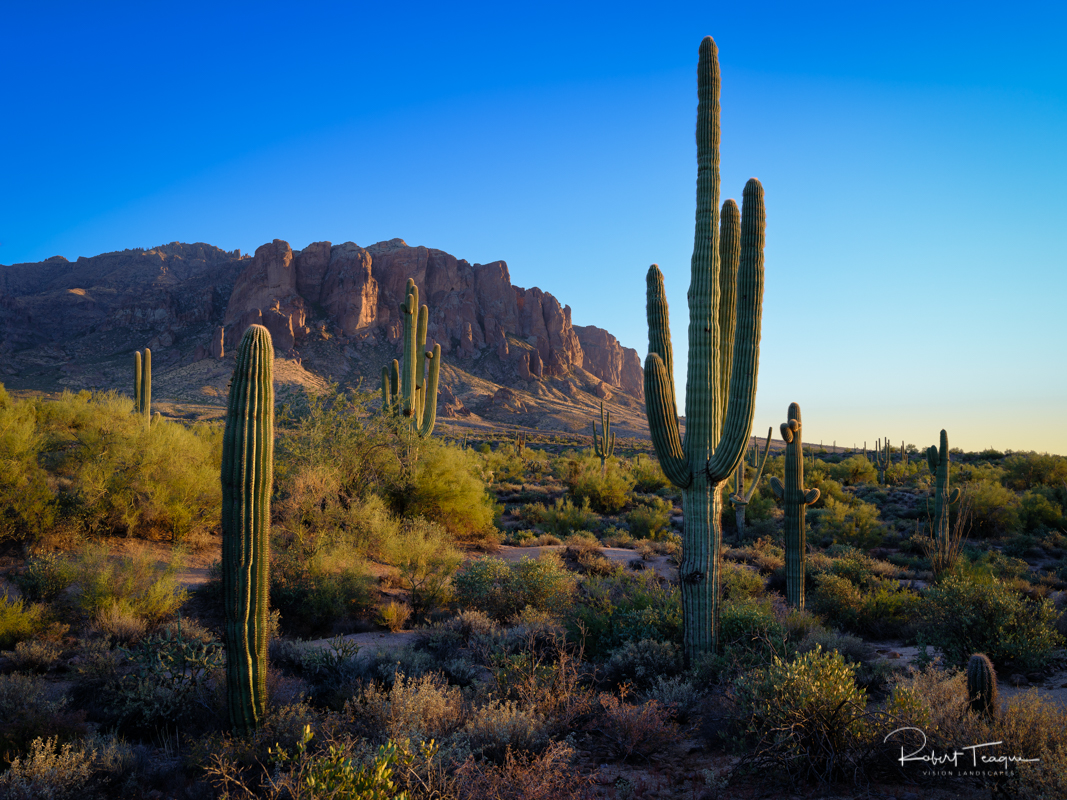 Superstition Mountain, near Apache Junction, Arizona
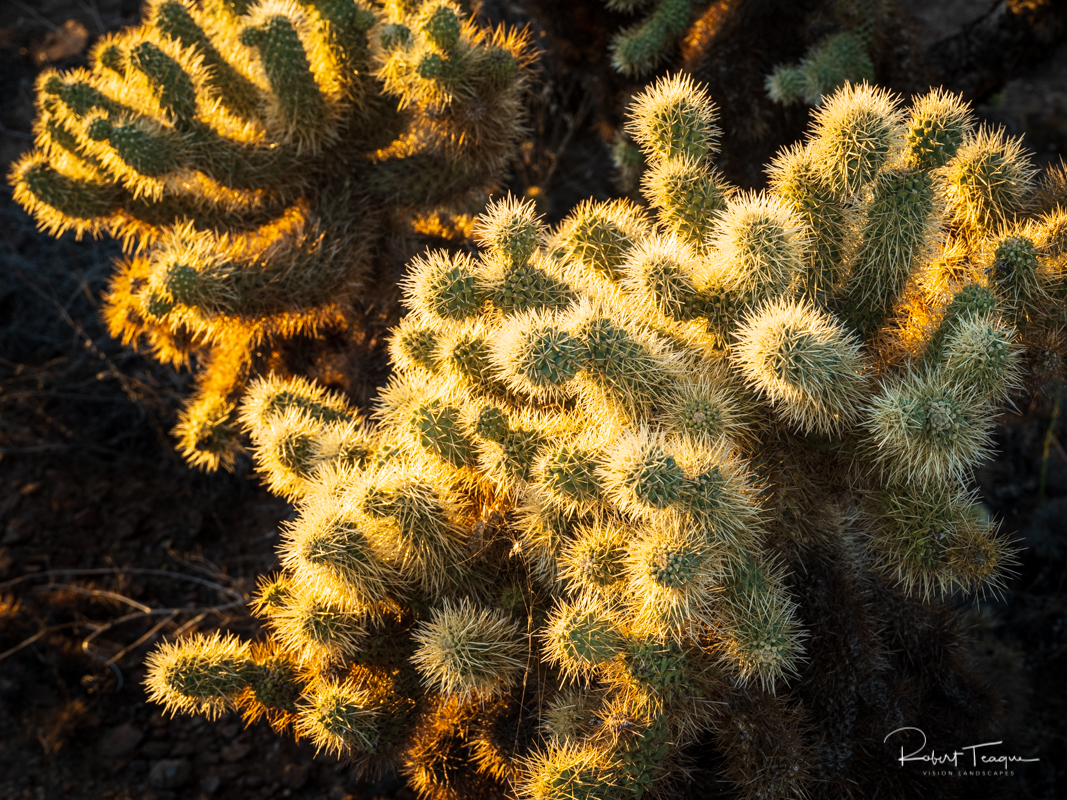 Cholla in the setting sun, Apache Wash Trail, Sonoran Desert Preserve, Phoenix, Arizona
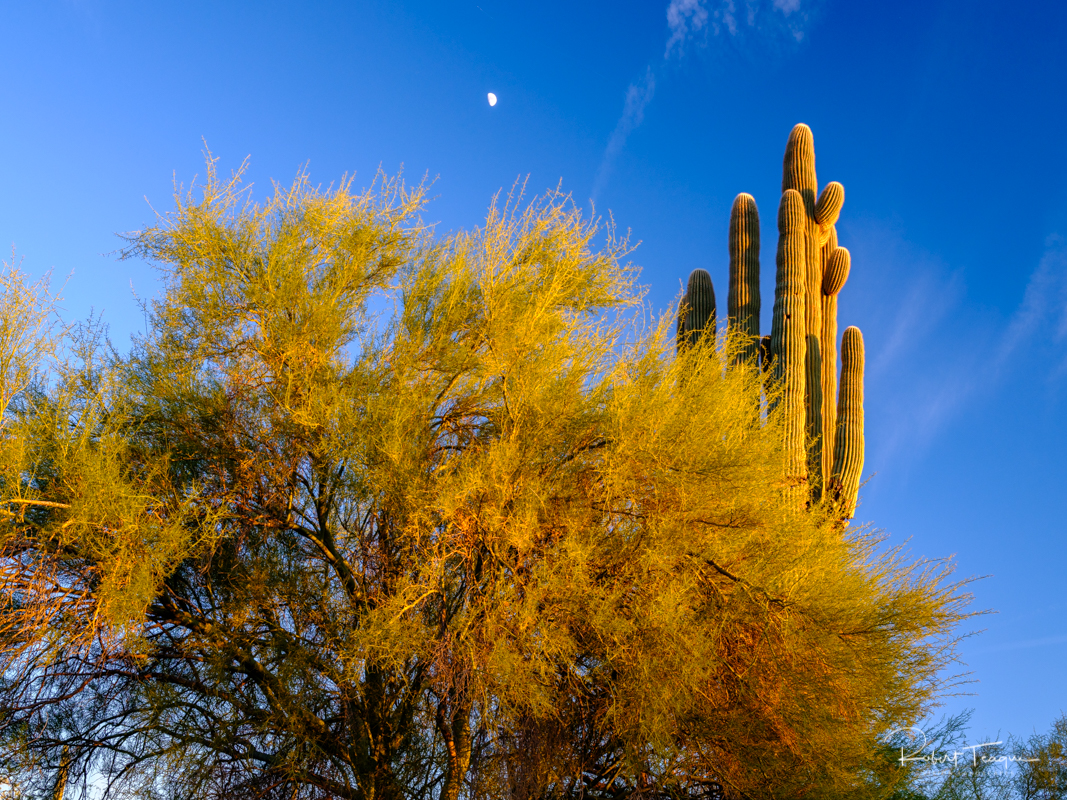 Late Afternoon Sun on Palo Verde and Saguaro, Cave Creek, Arizona
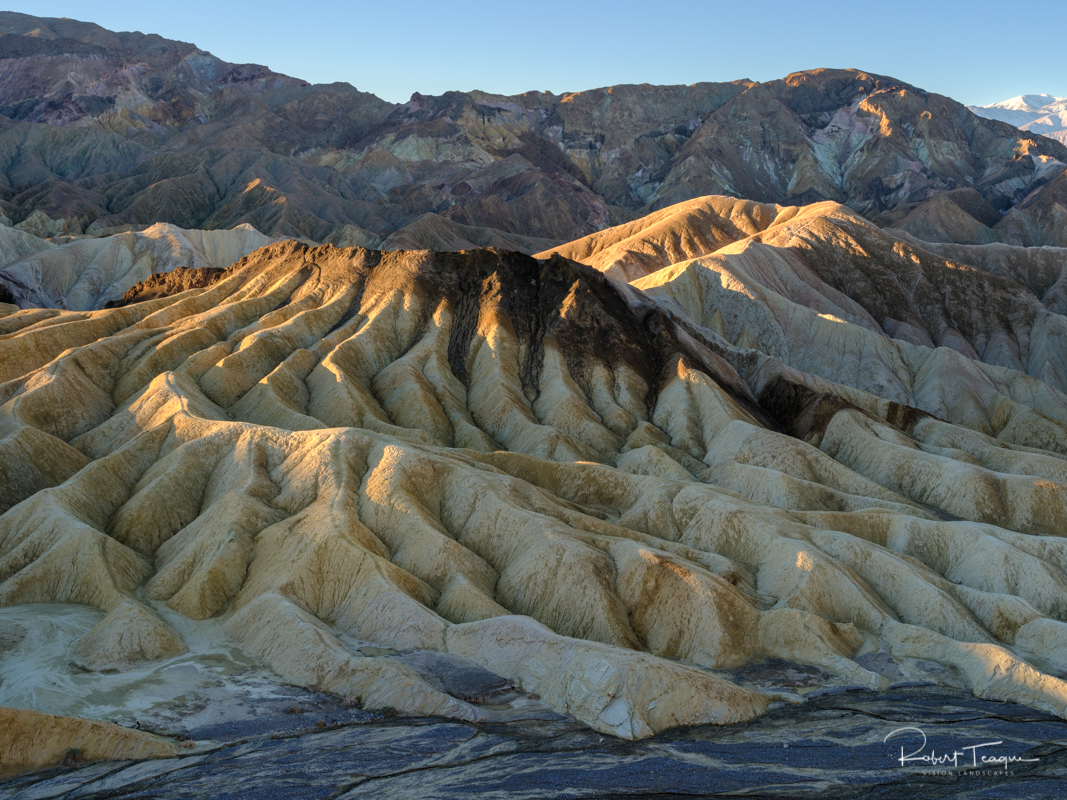
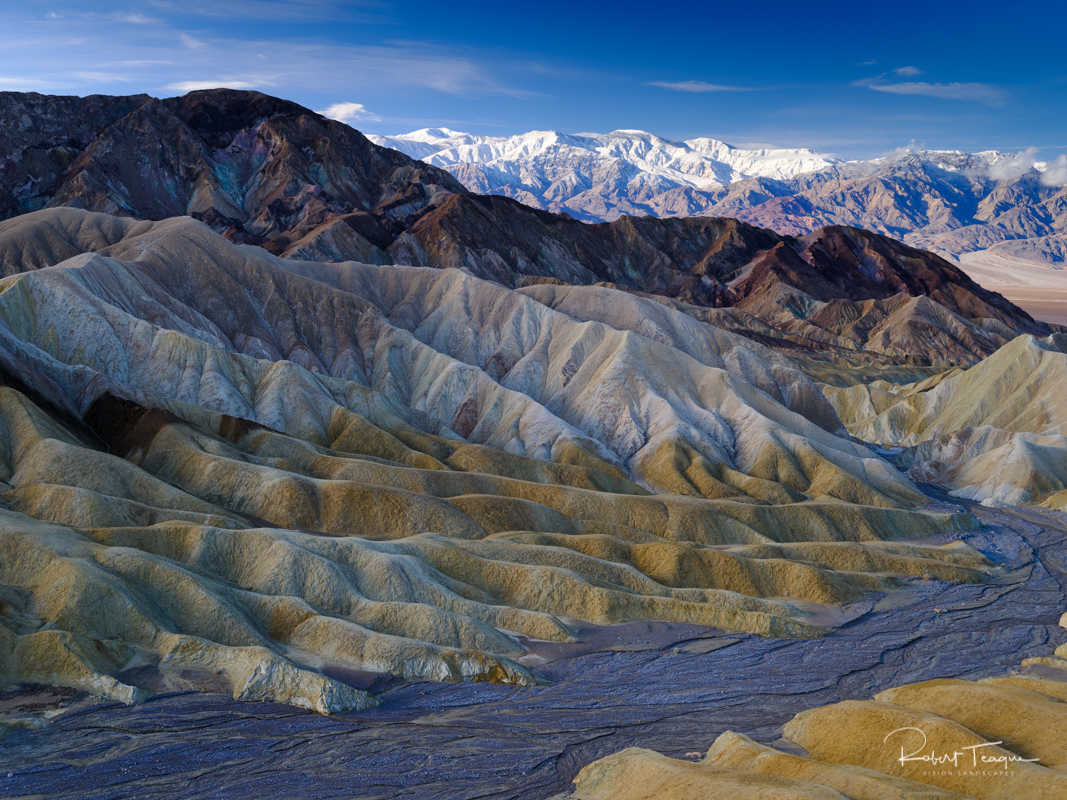 Bentonite Hills, Zabriskie Point, Death Valley National Park, California
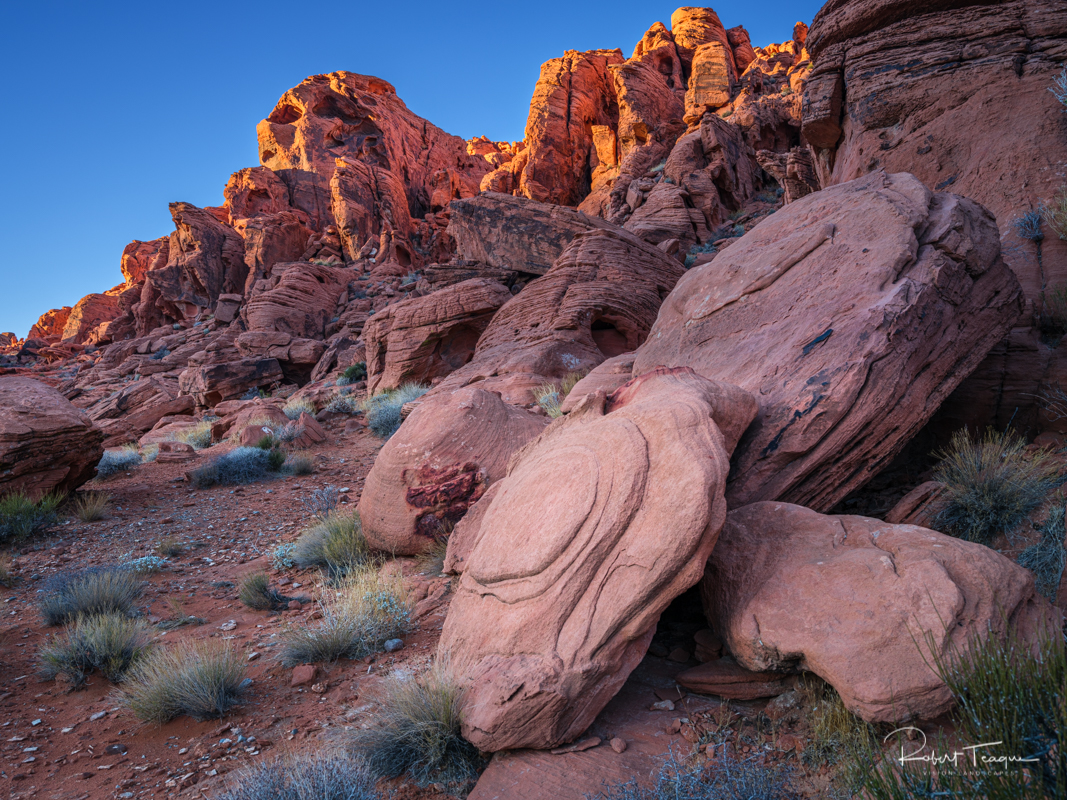 Valley of Fire State Park, Nevada
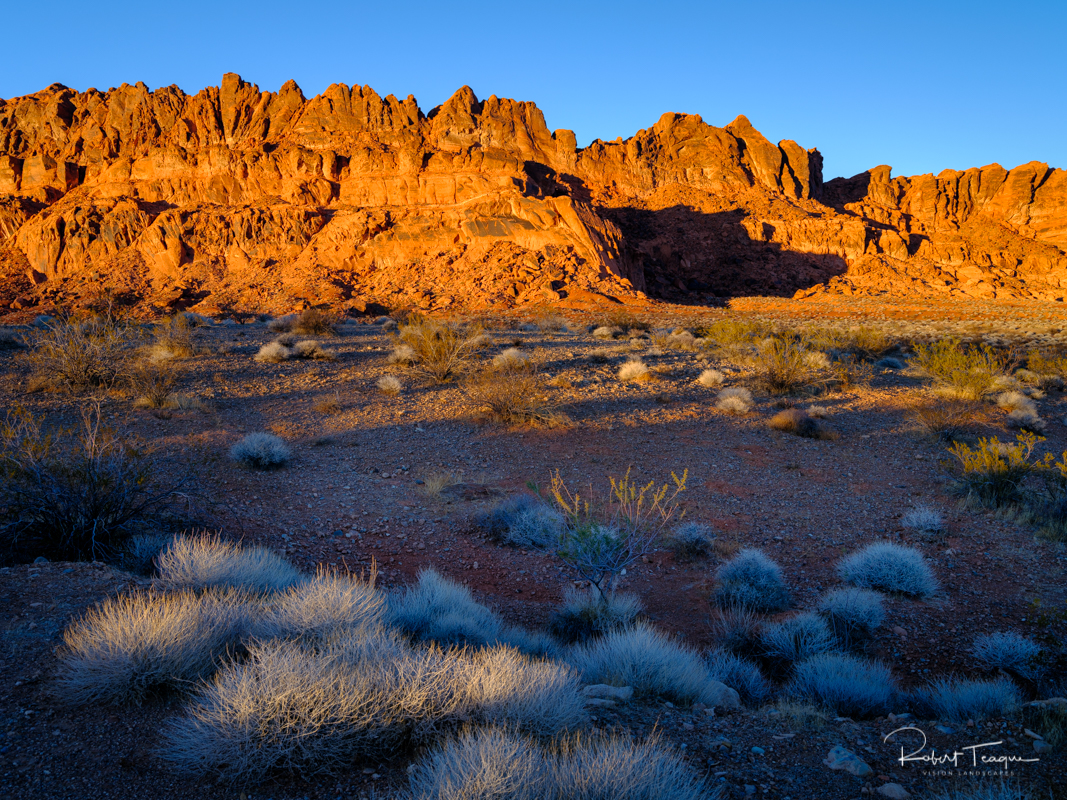 Valley of Fire State Park, Nevada