About the Large Format Camera
"You don't make a photograph just with a camera. You bring to the act of photography all the pictures you have seen, the books you have read, the music you have heard, the people you have loved." - Ansel Adams.
Why Large Format
I recently read a social media post where someone was saying that they had taken their 10,000th image with a month old Nikon DSLR, which to me thinking about this subject. Coming from a Large Format background, it took me years to reach that point with my current DSLR. My point isn't to criticize his style of photography, but to simply point out another simpler, slower, more contemplative style.
First and foremost, Large Format photography is about patience and vision ("seeing" the final photograph in the mind). Everything about the Large Format camera's use, from the initial setup to the act of taking the photo, requires patience, practice and an attention to detail. I'm sure that some photographers will find this limiting, but for me I find it liberating in that it slows me down and helps me think about what I'm trying to accomplish, and if the camera setup will accomplish it.
When using the Large Format camera, I rarely am able to do more than 3 compositions at any one session; 20 sheets of film may last me a week (that's 20 pictures). With this camera, there must be an awareness of the mechanical and technical aspects of photography, without forsaking the creative; both are integral to the process, and if one fails, the photograph fails.
The Mechanics
I often begin by simply walking the ground, looking about for a composition that best matches the format and capabilities of the camera. I know that when setup properly, the camera can give a depth of detail and focus that isn't possible with the single plane camera (like a DSLR).
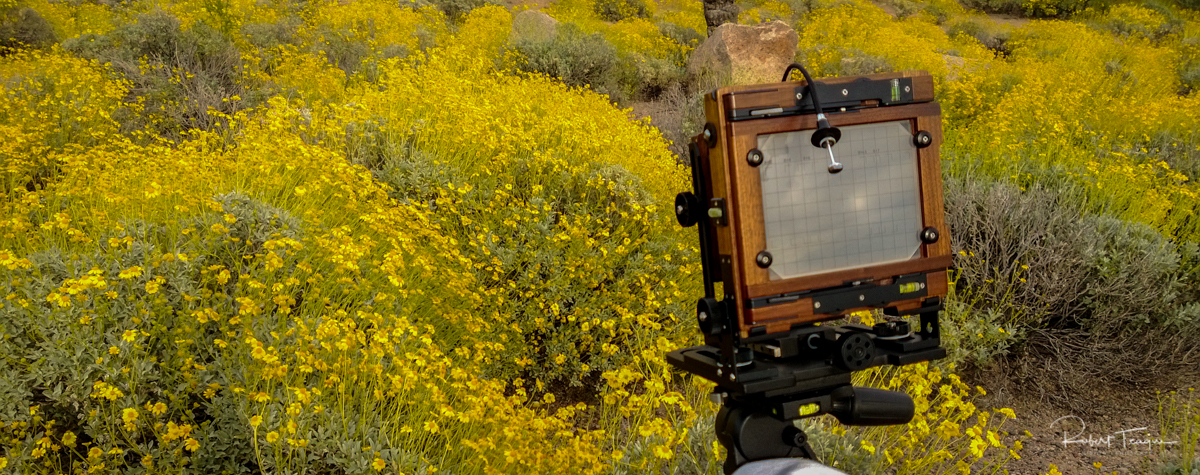
Once an initial composition is decided upon (it may change once its viewed through the ground glass), the camera setup process begins. The tripod is set to the proper height, and the camera removed from its case and mounted on the tripod (considering whether the tripod is extended to the correct height or not), the camera is leveled using the spirit levels on the camera - to make sure it's perfectly level, vertically and horizontally. Next, the proper lens is chosen. With this camera, there are no zoom lenses, only fixed focal length, which may require adjusting the tripod and camera once again.
After the correct lens is chosen, the bellows needs to be extended, in order to begin the process of focusing on the composition. With experience, extending the bellows to the proper setting becomes quick and easy. The lens needs to be set to its widest aperture, and the shutter opened for focusing. Normally, there is too much natural lighting to be able to see the image on the ground glass, so I use a dark cloth to cover the back of the camera, and focus the camera from under the cloth. In order to achieve the correct focus, I use a small loupe against the ground glass. This is simply the initial focus, and focusing may continue as the camera settings are tweaked. I'll point out here, the image on the ground glass is upside down and reversed, and which takes some getting used to.
I'll take an initial reading of the light, at multiple locations within the composition, using a handheld light meter, then taking into consideration the light levels from each of these light readings, determine what shutter and aperture I may want to use (manually adjusting either the shutter or aperture as needed).
The Creative
The initial setup of the camera is complete, and now the attention shifts to the creative process; the mechanical process is still there, but secondary to the creative at this point. Even though the camera is not setup and "technically" ready to take the photograph, I need to consider reconsider the composition and whether I need to modify the depth of field. I can control that by multiple methods; changing the aperture or tilting the lens or film planes. Changing the aperture is no different from what the user of a DSLR would do, however, tilting the lens or film plane, which increasing the depth of field, add subtle changes to the image and the way it looks.
Next, I reconsider the light. What is the light range from darkest to brightest in the composition. Film reacts differently from digital, transparency film (which I use most of the time) doesn't the same ability to capture the full dynamic range found. I'll often use a Lee graduated filter to hold back portions of the composition.
At this point I'm back to the mechanical, as I've made the creative decisions. I'll recheck the light levels with the handheld light meter, if the light is changing fast. Then, I'll set the aperture and shutter speed, close and cock the shutter (often I'll trip the shutter once to make sure it's working correctly), and load the film into the back of the camera. I'll pull the slide on the film holder and take the exposure, then replace the slide. Depending upon the composition and light level, I may change the shutter speed and take an additional one or two exposures; repeating the previous steps.
I'll jot down any notes about the composition and note the exposure settings. I find the notes about the composition helpful for a return visit. At this point I've finished a single composition; a process which may have taken several minutes.
What I've presented here is a simplified overview of the process, and which works for me. Other Large Format photographers have their own way of working, which may be similar, but different to suit their own personalities.
The Camera
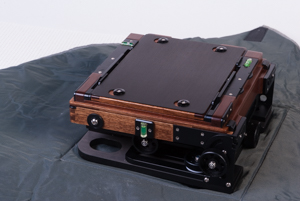
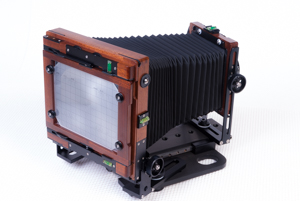
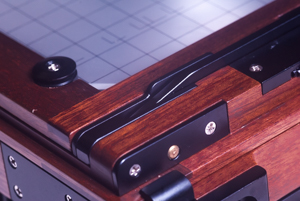
Currently, I use a Chamonix 45N-1 camera. The 45N-1 is the first generation of the Chamonix 45 series (4x5). The camera was designed by a Chinese mountaineer and is hand crafted in Haining, China, of American walnut, with a carbon fiber bed and aluminum fittings, making the camera lightweight and rigid. I occasionally use a Horseman 6x12 Roll film back for panoramic photos.

Website: Chamonix View Cameras
This is a fully manual camera, there are no electronics in the camera and nothing is automated. Taking a photograph with this camera is about having a vision (within the framework of a more contemplative process) and carrying the necessary equipment to bring out the subject on film. When shooting Large Format in the field I carry the following pieces of equipment in a backpack:
- Chamonix 45-N1 Camera
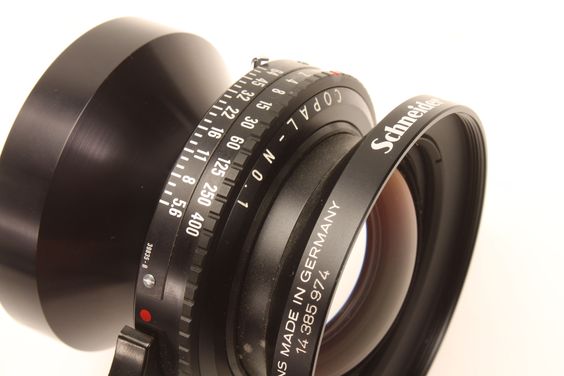
- Various Lenses (in their cases)
- Horseman 6x12 Roll Film Back
- Manfrotto Tripod
- Sekonic L-750DL Light Meter
- Toyo Magnifying Loupe
- Dark Cloth
- Cable Releases (mounted on each lens)
- Film (normally Fuji Velvia)
- Film Holders (Quick Load, Ready Load and traditional)
- Lee Filter Holder and various filters (mostly split neutral density)
- Notebook and Pencil - for recording my thoughts and exposures notes
This is obviously not a light load. Packing and unpacking the camera and related equipment can take several minutes and as a result I don't setup the camera unless I feel that the composition can work.
The Film
In the days before digital, film photographers, including large format photographers, had a wide variety of film from which to choose. In the post digital world, film choices are limited. Unlike many large format photographers, I prefer to work in color and not black & white. I still have a freezer full of Fuji Velvia and other various films (some in Fuji QuickLoads and Kodak ReadyLoads), but I'm much more careful with how and when I shoot large format.

The Process in the Digital Age
Once I've returned from a photography session, the work is not finished. I'll need to send the film off for developing; since I shoot primarily color, which is a standardized process, I find it acceptable to hand the development off to a professional lab. When the film is returned, I'll decide which sheet of film I'd like to work with further and have it sent off for drum scanning.
The resulting file from a drum scan, is a 16-bit, 425 MB, TIFF. I'll then load this onto the computer for further processing. Previously, I would print on Cibachrome, but since that's no longer an option, I've moved to printing digitally. I currently use Photoshop CC and Tony Kuyper's TKActions panel to prepare my photos for printing, and then print on a variety of surfaces.
Final Thoughts
Over the years, I've been fortunate to take my Large Format camera into the mountains of New Zealand, the deserts of the Australian Outback, the sometimes peaceful shores of Hawaii, and now the Sonoran desert of Southern Arizona. It's been my constant companion for many years. I still love using the camera, and I intend to continue as long as possible, although a great portion of my workflow has since evolved into the digital realm. I no longer take it on long distance trips by air.
To learn more about my photography and this website, see Welcome to Vision Landscapes